Setting up Amazon ECR
If you want to use an on-premises instance of ninkik and make use of Amazon Elastic Container Registry to store and distribute your Docker images, you have to set up your AWS environment properly.
Set up ECR
- In the AWS console, select your region where you have deployed ninkik.
- Below Services, search for Elastic Container Registry.
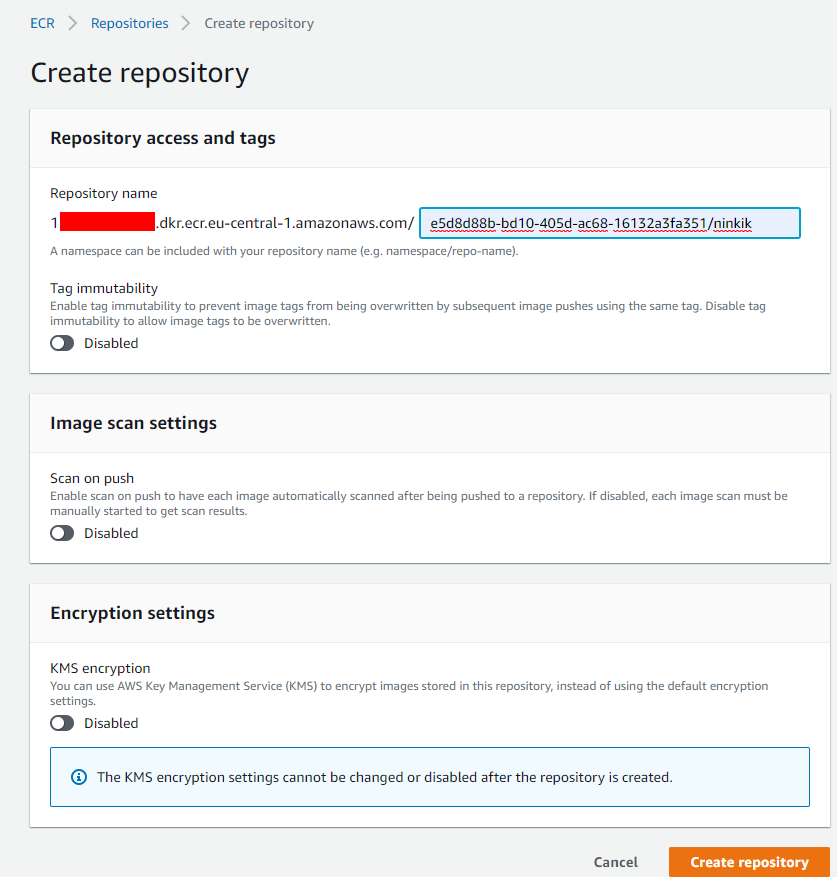
- Click on Create Repository.
- In the following dialogue, you have to enter the repository name in which you want to store your artifacts. You have to use the format ${YOUR_TENANT_UUID}/${YOUR_PRODUCT_UUID_OR_INTERNAL_PRODUCT_NAME} so ninkik can match the repository and your tenant.
Create a new user for ECR
In IAM create a new user with read and write permissions for the previously created ECR.
Add the access key and secret access key profile into your ~/.aws/credentials file and test the login with
aws --profile docker-user ecr get-login-password --region eu-central-1 | docker login --username AWS --password-stdin 1666666666.dkr.ecr.eu-central-1.amazonaws.com
docker tag hello-world:latest 1666666666.dkr.ecr.eu-central-1.amazonaws.com/hello-world:latest
Configuring EventBridge to receive ECR events
ninkik gets informed by an Amazon SQS queue in which events from the ECR published.
- In the AWS console, search for SQS.
- Click on Create queue, enter ecr-docker-push as queue name and select Standard as Type.
- The Message retention period can be lowered to 1 minute.
The next step is to configure EventBridge to send ECR events to the previously created SQS queue.
- In the AWS console, search for EventBrige
- Click on Create rule
- Select Event pattern and Custom pattern and put the following JSON definition into the Event pattern field. Make sure that you replace the account field with your own Amazon AWS account ID:
{
  "account": [
    "166666666666"
  ],
  "detail-type": [
    "ECR Image Action"
  ],
  "detail": {
    "result": [
      "SUCCESS"
    ],
    "action-type": [
      "PUSH"
    ]
  }
}
It matches the pattern defined in Amazon ECR documentation
- Below Select target, select SQS queue as Target and your previously created ecr-dopcker-push queue as Queue
Add permission for ninkik's IAM user
To let ninkik read the queue's messages and Docker images, go to IAM and create the following two policies. Attach them afterwards to your AWS ninkik user
Read permission for the ECR registry
{
    "Version": "2012-10-17",
    "Statement": [
        {
            "Sid": "VisualEditor0",
            "Effect": "Allow",
            "Action": [
                "ecr:DescribeImageScanFindings",
                "ecr:GetDownloadUrlForLayer",
                "ecr:DescribeImages",
                "ecr:DescribeRepositories",
                "ecr:ListTagsForResource",
                "ecr:ListImages"
            ],
            "Resource": "arn:aws:ecr:eu-central-1:${YOUR_AWS_ACCOUNT_ID}:repository/${YOUR_NINKIK_TENANT_UUID}/*"
        },
        {
            "Sid": "VisualEditor1",
            "Effect": "Allow",
            "Action": "ecr:GetAuthorizationToken",
            "Resource": "*"
        }
    ]
}
Read permission for the previously created SQS queue
{
    "Version": "2012-10-17",
    "Statement": [
        {
            "Effect": "Allow",
            "Action": [
                "sqs:GetQueueUrl",
                "sqs:ReceiveMessage",
                "sqs:GetQueueAttributes"
            ],
            "Resource": "arn:aws:sqs:eu-central-1:${YOUR_AWS_ACCOUNT_ID}:ecr-docker-push"
        }
    ]
}
After that, attach both policies to your AWS ninkik user.